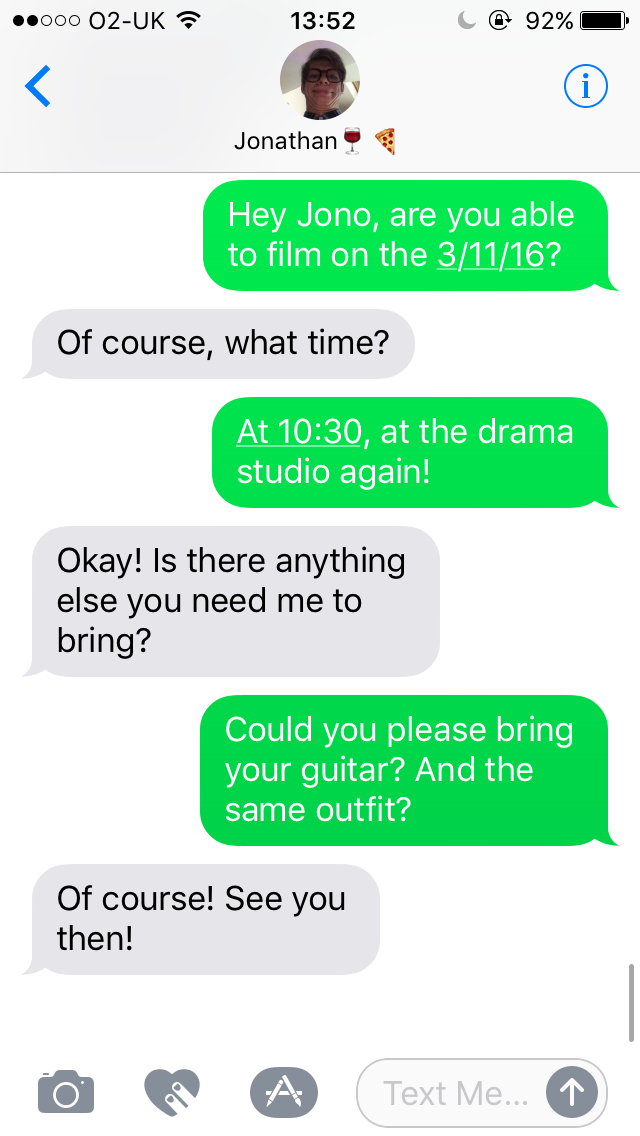
I have been communicating with Actor 1 so that he is aware of the filming schedule. I have sent him messages discussing the filming dates and times. We have already practiced the final makeup and costume choice, therefore he is aware of what he will need to bring with him. I have also asked him if he could bring in his guitar, so that I can get some footage of him playing along to the song. I have already communicated with Mr Molyneux about the availability of the drama studio and he has told me in person that it is free on the dates and times which I wish to film on.
I have created a shooting schedule so that both me and my actors are aware of when filming will take place. On each of the dates, I have allowed enough time so that I can set up the background and lighting as well as do the actors makeup. I shall now send these dates and times to my actors so that they know what date, time and location we are filming in. I decided to also list the props that I need to bring from home so that I can easily remember everything that I need.
I wanted to gain feedback from my target audience in order to find out what costume was their favourite. I sent each outfit to some people in my target audience and asked them to respond with which one they liked the most and why. I used text messaging as well as whatsapp to get in contact with my target audience.
These were the replies for the casual outfits:
From this feedback I can see that my target audience all like different outfits for different reasons. However I think that I shall use outfit 3 because of its simplicity which has an edgy look to it. I also think that for what I want to film, it will be the most appropriate costume.
These were the replies for the dressy outfits:
From this feedback I can see that my target audience likes dress number three the most because of its shape and detail. However Im not sure if this dress is my favourite. For now I will plan to use this dress in my music video due to its popularity. But if I come up with a different idea then I shall use that.
I plan to use two different costumes for this actor; one being more causal whilst the other is more dressy. I have come up with a couple of different ideas for each of these outfits which I think will be somewhat reflective of the indie rock genre. My favourite of the casual outfits is the third one, this is because I think that the halter neck top is more interesting that just a normal t-shirt. This outfit also shows a lot of the models skill which will allow the colour filters to be picked up on her skin. However I don't happen to have a favourite dressy outfit because they are all quite similar in style because they are all black dresses paired with fishnet tights.
Therefore I am going to ask my target audience what casual and dressy costume is their favourite and why. This will help me to gain feedback on the costume choices and come up with a final costume idea for actor 2. These are the potential casual costumes:
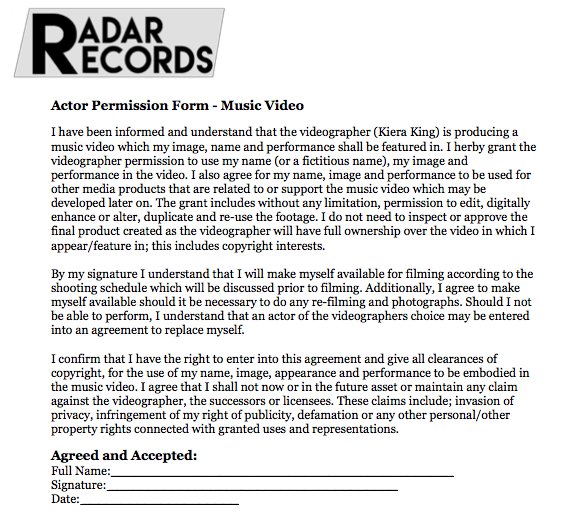
I decided to create an actor permission form, in order to make sure that my actors fully understood their commitments in my music video. I shall print out copies of this form and give them to my actors so that they can read and sign it. The permission form states that I shall be using their identity for throughout the process of creating the video which they are now aware of. By signing and agreeing to the form, the actors are under the agreement for me to use their; name, image and performance in my video which I am then able edit and manipulate how I want to after filming is completed.
Now that I have got this permission from the actors, I can begin to plan the filming and production process for my music video.
As I want my music video to be different colours, I thought that I would use coloured acetate to tint the colour of the footage. My original plan was to use the acetate on top of the studio lights, however when I tried this it didn't work out particularly well and the colour pay off was minimal. Therefore I decided to use the acetate in front of my camera lens. I used different colour including; red, orange, green and blue. I used two studio lights either side of the camera in order to light the actor so that the filter would be applied to them. I found that using just one piece of acetate for the green and blue didn't give off much colour. Therefore I decided to layer two pieces on top of each other to increase the intensity of the colour tint; this was effective.
I found that the using the acetate was effective because it tinted the colour of my footage. However there was one slight issue with it. I found that the footage recorded using the red piece of acetate appear particularly grainy whilst the rest of the colour did not. I feel like the grainy footage will look unprofessional and might not be attractive to my target audience. Therefore I am going to try and different method for filming with a red filter. This will either be in the preproduction process or seeing if my camera has a setting which enables me to change the colour. Another slight issue was that fact I was unable to support the acetate with anything in front of my camera and therefore had to hold it. This become quite tiring and resulted in the paper getting fingerprints on them which was somewhat delectable on the footage. If I continue to use the acetate, I will need to find a solution for this.
As I was happy with the general outcome of the acetate footage I shall do some filming involving it and see how the footage turns out. If it is too grainy, I shall not use it.
I want to use strobe lighting in my music video because I think that it will suit the pace/speed of the song. Therefore I decided to do some practice shots using a strobe light which I bought. To make the light change colour, I cut some pieces of red, orange, blue and green acetate to the size of the light and used blu-tac to stick it down with. This changed the colour of the strobe light from white to whatever colour was on top of it. I found that only using one piece of acetate didn't give off a strong enough colour payoff, therefore I layered two pieces together to intensify the colour.
I found that using the coloured acetate over the white light was effective in changing the colour and overall I like the effect. I found it quite difficult to get the camera to focus on the actor however due to the lack of lighting in the room. This meant that the majority of the time whilst practicing with this lighting, the actor appears out of focus in the footage. Therefore when it comes to the production process I will need to spend a reasonable amount of time filming with the strobe light to ensure that I have enough footage which is in focus. I will also experiment more with the positioning of the strobe light to ensure that the actor full face is covered by the lighting.
I wanted to experiment with different ways in which I could create colour filters over the actor. One of the ways that I thought of was using a projector. Therefore I decided to do some test shots to see how the projector would look and work. I use a projector which was available in my school and set it up to a laptop on which I had created a powerpoint of different colour slides which I wanted to use. The setting up of the projector was straightforward, however when it came to using it on the model things changed.
I struggled with get the projector at the right angle so that the colours would only be seen on the actor. When I was successful with getting the angle right, it meant that I was unable to change the positioning of the model and the zoom lengths that I was using due to the fact the rest of the screen was being displayed on the background. I also found that the positioning of the projector caused a black shadow to appear on one quarter of the actors face; this made the colour filter lose it purpose. Overall I am not very happy with how the projector worked out. Therefore I shall not be using it in the filming and production process of my music video.
I decided that before I began the filming/production process that I would practice some shots with the equipment that I plan to use with actor one. Therefore I got in contact with the actor so that we could arrange a date to do the test shots on. By practicing using the equipment before the production process I will be able to use the equipment confidently and will know where to put it and what works best. This should make the production process much smoother.
I wanted to gain feedback from my target audience in order to find out what costume they thought would be most appropriate for my music video. I sent each outfit to some people in my target audience and asked them to respond with which one they thought would be the most appropriate and why. I used social media sites such as google hangouts and WhatsApp to get in contact with my target audience as well as text messaging.
These were the replies:
These responses show that there are mixed opinions within my target audience about which outfit is the most appropriate. However I personally believe that outfit two will be the most appropriate due the simplicity of the outfit. It will also blend in with the colour of the background which I shall be using to film which will make the video look more fluent. I still do think that my target audience will like this decision because the costume is reflective of the indie rock genre.
Whilst I am only using one costume for this actor in my music video, I have come up with 3 potential costumes. All of which include black skinny jeans and a flannel. Whilst I think that my favourite outfit is the one with the black t-shirt (outfit two), this is because the colours blend well together and will match the background. Because of the simple design the costume won't distract the audience away from the coloured lighting and strobing that will be taking place throughout my music video.
However I will ask my target audience what their favourite outfit happens to be so that I can see if they have the same opinion as me or if their opinion is different about the costumes. These are the 3 potential costumes;
After conducting research into the makeup and costumes that I wanted Actor 2 to wear, I got in contact with her so that we could meet in order to test some of the makeup. As I conducted specific research into the makeup look I wanted the model to wear I only practiced one makeup look. I was very happy with the outcome of the makeup and have decided that it is the final look that I will use on this actor in the music video. Here is a video showing the products used and how they were applied:
Earlier in the year, I went to the O2 Academy at Brixton and Reading Festival to see the 1975 perform live. When performing live the 1975 are known for their visual light show. The performance featured many different coloured backgrounds, strobe lighting as well as coloured projections. I was thinking about this recently and thought that the bands visual performance is good inspiration for my own music video. Therefore I went back and looked at the pictures that I took as well as looking at their live performances on YouTube so that I could draw inspiration and ideas from them.
From seeing the 1975 live and re-watching some of their performances, I have been able to gain inspiration for the lighting within my own music video. The visual show that the band put on is incredible and has inspired me to experiment with different colours and projections in my own music video.
As I want to experiment with colours and lighting within my music video. I decided to search for some music videos that gave me ideas and inspiration for lighting that I could use within my own music video. I found each video inspiring for a different reason, and I think that from watching these videos I have a better understanding of what it is I want to achieve with the lighting in my video.
In this music video, I was inspired by the use of strobe lighting. I liked how the strobe lighting was in time with the music and was used to change between scenes. The music video continued to show different women dancing to the music and running their hands over their bodies. This is something that I would like my Actor 2 to do, therefore I might show them this music video so that we can both get inspiration for movements that they can do.
In this music video, I liked how colour filters had been used. The colour red was the dominant colour throughout the video, however some blue and purple was also used. Another thing that I liked in this video was the layering. Layering/overlapping of footage was constantly used throughout the music video; I think that this made the transitions between the clips smooth and made the video feel more dreamlike.
I like this video because of the red filter/lighting used throughout the music video. The colours on the screen continued to swap for the duration of the music video; the background would be black and the artists would be red and then the background would be red and the artists would be black. I like how this looked as it made the video more engaging by subtly changing the contrasts.
In this music video, I liked how cuts were made so that the background would change to the beat and pace of the song. I feel like this makes the video work better with the song, because it changes as the beat does. Another think I like about this music video, is how the lead singer really exaggerates his lip syncing for specific parts of the song. This is similar to how I want Actor 1 to lip-sync in my music video; therefore I will show him this video so that he can gain inspiration for his lip-syncing.
I like how two different colour filters/lighting (red and blue) have been used in thus music and then the footage has been overlapped. It makes the music video, appear almost 3D because of the colours and how it has been edited.
I been listening to the song that I am going to use for my music video and I have come up with a couple of different shot ideas that I think would work well in the music video. I have decided to brainstorm these ideas so that I can reference them later, when I begin the production/filming process.
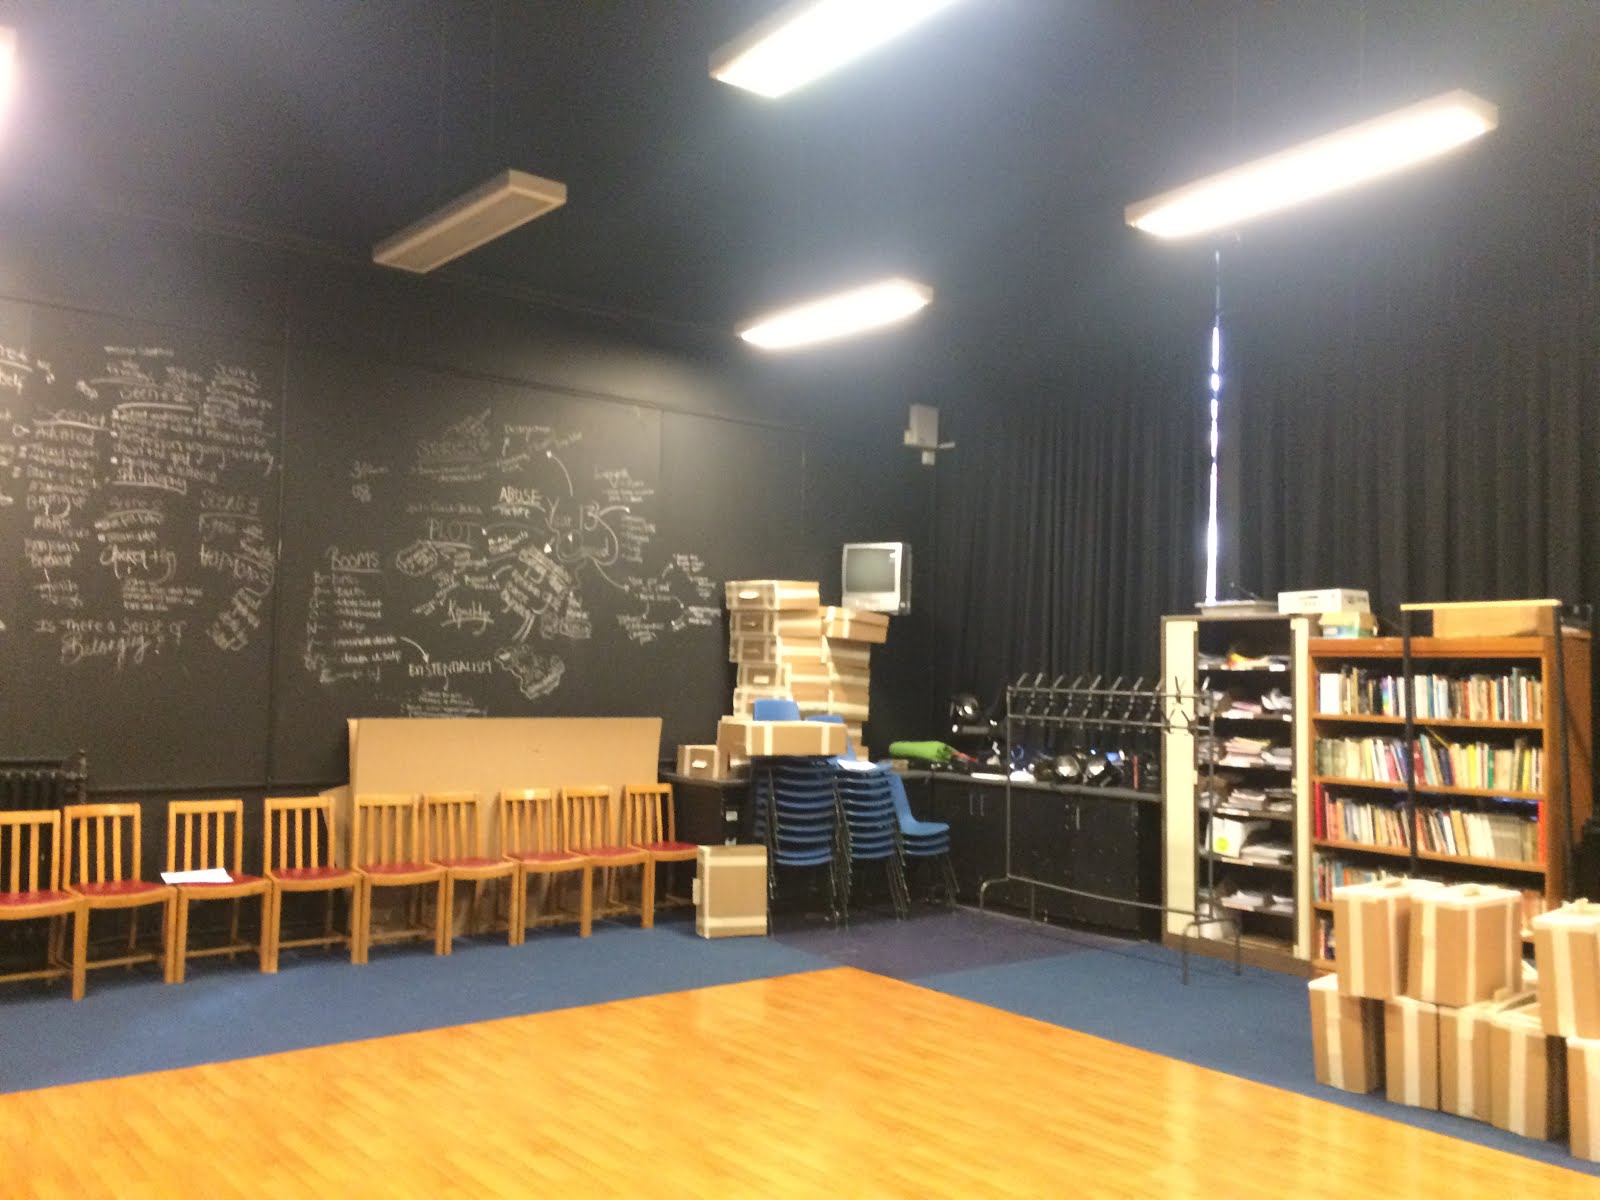
The location that I want to use for my music video is in a studio, I have scouted locations which will be easy for both me and my actors to get to. I have found 2 potential locations and decided to visit them to test their suitability for the filming I plan to do. Both of these locations happen to be at the school that I attend, therefore I will know all of the times that I can access these locations and I will also be able to get to them easily. These locations are;
The Drama Studio:
This room is painted black; therefore no light will be reflected from the walls. In addition to this there are also long black curtains which cover the windows in the room; this will block out any natural lighting. The room is also rather spacious, this will allow me to set up all of the equipment and experiment with different angles and viewpoints.
M9 – Media Classroom:
This room has multiple different backgrounds; black, white and green. Therefore I could use this for the background of my music video. This room is also equipped with, professional studio lighting. This will allow me to make sure that I am happy with the lighting in the music video. The main limitation of this room, is that the background is only a certain size/width. Therefore I will not be able to experiment as much with angles when filming in this location.
Overall I think that these locations will be suitable for the filming of my music video. Depending on the colour background that I want to use, I can go between the locations. Therefore it is likely that I will do the filming for my music video in both of these locations.
After reading the feedback from my target audience, I decided to use some of their ideas to adjust my logo. This is because I want the record label to appeal to and interest my target audience. They suggested that I added a coloured background to the logo, in order to make it stand out when placed on a promotional magazine advert or album cover. They also recommended that I used a shape/boarder around it. From this I used Adobe Photoshop to add a light grey background; this was because it was a subtle colour and wouldn't be particularly distracting. For the border, I used a rhombus styled shape. This was because I thought that it would be more interesting than just a rectangle.
Overall I am happy with the final outcome for my logo. I think that it is simple yet effective. By listening to my audiences feedback, I was able to make the logo something that they thought was appropriate. Therefore it is now something that will appeal to them.
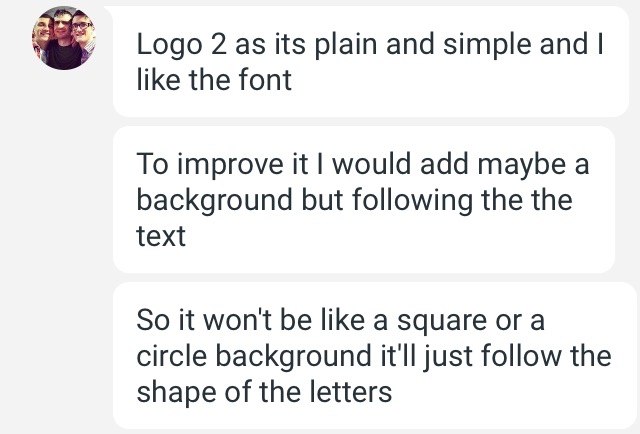
I wanted to gain feedback from my target audience about what they thought of my record label logo ideas. I sent them each logo and asked them to respond with, which one was their favourite and why. As well as with how they thought, the logo could be improved. I used social media sites such as whatsapp and google hangouts to get my feedback.
These were the replies:
From this feedback I can see that my target audience generally prefer the second logo design. This is because it is simple and easier to read. However they did recommend that I made small adjustments to the colour of the background in order to make the font stand out more. I agree with my target audience and will therefore listen to their feedback and change my logos design accordingly.